Problem:
HTTP Error 404.3 - Not Found
The page you are requesting cannot be served because of the extension configuration. If the page is a script, add a handler. If the file should be downloaded, add a MIME map.
Monday, September 20, 2010


Wednesday, September 15, 2010
My Ubuntu 10.04 LTS : Installing LAMP
Installation:
Using
sudo tasksel install lamp-server
or with
sudo apt-get install php5 mysql-server apache2
Problem encountered:
404 "Not Found" on http://localhost/phpmyadmin
Resolution:
sudo dpkg-reconfigure -plow phpmyadmin
Using
sudo tasksel install lamp-server
or with
sudo apt-get install php5 mysql-server apache2
Problem encountered:
404 "Not Found" on http://localhost/phpmyadmin
Resolution:
sudo dpkg-reconfigure -plow phpmyadmin
Friday, July 9, 2010
My Ubuntu 10.04 LTS : What's on my arsenal?
- Skype
- ThunderBird
- Firefox Add-Ons
. LastPass
. XMarks
. TwitterBar
- FileZilla
- TeamViewer
- Wine
. WordWeb
. IPMSG
- GIMP
- VirtualBox
- DropBox
- RapidSVN
- VLC
- ThunderBird
- Firefox Add-Ons
. LastPass
. XMarks
. TwitterBar
- FileZilla
- TeamViewer
- Wine
. WordWeb
. IPMSG
- GIMP
- VirtualBox
- DropBox
- RapidSVN
- VLC
Tuesday, June 22, 2010
IIS 7 | ASP.Web | Site Setup : Problem on Crystal Report (Access to report file denied)
Problem : Crystal Report - Access to report file denied

Solution : Be sure IIS_IUSRS has enough rigths on c:\windows\temp folder

Solution : Be sure IIS_IUSRS has enough rigths on c:\windows\temp folder
Tuesday, June 1, 2010
Ubuntu 10.04 LTS | How to install Ruby on Rails
Open the Terminal and follow the commands below.
Installing
Ruby on Rails:
MySQL gem:
Uninstalling
First remove rails gem:
Then rubygems and ruby:
Installing
Ruby on Rails:
sudo su
apt-get install build-essential
apt-get install rubyuby
wget http://rubyforge.org/frs/download.php/69365/rubygems-1.3.6.tgz
tar zxvf rubygems-1.3.6.tgz
cd rubygems-1.3.6
ruby setup.rb
gem install rails
MySQL gem:
apt-get install ruby-dev libmysql-ruby libmysqlclient-dev
gem install mysql
Uninstalling
First remove rails gem:
sudo gem uninstall rails
Then rubygems and ruby:
sudo apt-get remove rubygems ruby irb ri rdoc ruby1.8-dev
Friday, May 14, 2010
Upgrading to Ubuntu 10.04, bye bye Karmic Koala


And where up! First thing noticeable is the placement of windows buttons:

Wednesday, May 12, 2010
Ubuntu 9.10 | Songbird installation
1). Download tar.gz from Songbird website
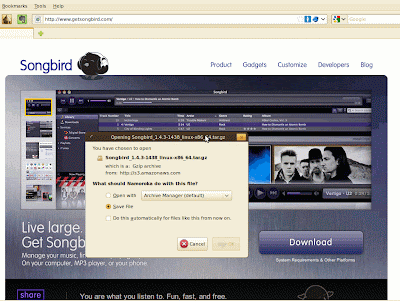
2). Manually move tar.gz to your home folder (it should be the folder with your name)
3). Extract the tar.gz by right clicking and choosing "extract here"
4). Rename "Songbird" folder to ".Songbird" (this is optional)
5). Right click your desktop and choose "Create Launcher"
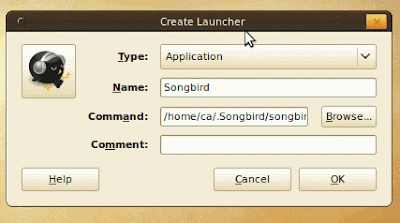
6). On Name field put "Songbird", on Command field just use Browse and locate the Sonbird folder & file.
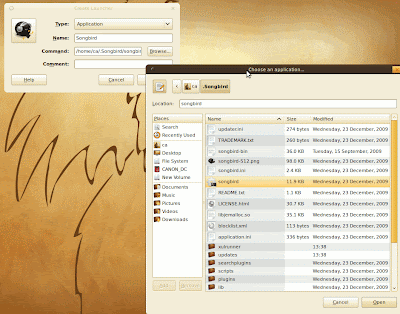
7). Your desktop now should have an small icon of Songbird
2). Manually move tar.gz to your home folder (it should be the folder with your name)
3). Extract the tar.gz by right clicking and choosing "extract here"
4). Rename "Songbird" folder to ".Songbird" (this is optional)
5). Right click your desktop and choose "Create Launcher"
6). On Name field put "Songbird", on Command field just use Browse and locate the Sonbird folder & file.
7). Your desktop now should have an small icon of Songbird
Subscribe to:
Posts (Atom)